Sunday, December 13, 2009

Recipe: Make Your Own Horseradish

Horseradish… dispense with the jarred stuff

By: Tom DiGangi, Jr.

After my wife walked into the house smiling broadly and displaying an enormous quantity of horseradish from the garden, I was curious. After reading the ingredients on a jar of store bought horseradish in our refrigerator, I was inspired. Why don’t we make our own?

A bit of research and a few minutes later, we were comparing our own homemade horseradish to the stuff from the jar. The difference was remarkable. Ours was, for lack of a better word, pure. The jarred horseradish was eggy and sweet, in an unpleasing way. And, the heat difference was remarkable. The homemade product was hot, a good hot. The kind of hot that makes you want to eat, then eat more, then wipe your brow and when you’re done, blow your nose. That’s worth making your own horseradish.

Horseradish (Basic Preparation)

Ingredients

1 Large Piece of Horseradish (about 5 inches)

3 T. Water

3 T. White Vinegar

Kosher Salt to taste

Procedure

Peel the horseradish with a vegetable peeler, roughly chop and add to a food processor or blender with the water and salt. Puree until smooth. Add the vinegar and puree again. If you want the final product HOT, then wait a few minutes before adding the vinegar because the acidity halts the development of heat.

Adjust the seasoning with salt. Serve immediately or store in the refrigerator for a month or more.

How Not To Grow Horseradish

I had read quite a bit on the topic by the time I trotted out of the Agway with my sandwich sized paper bag full of small stick-like horseradish roots. The main information I had taken away after skimming through a variety of sources was this: horseradish runs. Put it in the vegetable garden and those delicious underground roots will spread everywhere without concern for the rest of your plants. Some articles suggested growing them in large whiskey barrel buckets, and others suggested pots sunk into the ground. I had both my thinking cap and my smarty pants on (as they say in Sophia's preschool class) when I took three of my sticks and buried one each in various plastic pots and in turn buried the pots in different part of my garden. Therefore, let me share my tried and true knowledge about how (not) to plant horseradish.

1.) Buy horseradish roots for planting in early spring, at the same time that stores are selling seed potatoes and asparagus roots.

2.) Plant horseradish at a 45 degree angle with the growing tip pointing up. The growing tip should be only a few inches below the ground. Plant in a pot with rich garden soil, and then bury the pot in the garden up to the lip.

3.) Ignore it.

4.) The following year, notice that the topgrowth is not very significant and blame the store where you purchased them. Repeat step three.

5.) The year after that, notice that the topgrowth is better and think you ought to re-read about what you're supposed to do about it. Get distracted by brightly colored bug, or diseased crop, or wayward rodent. Remember horseradish, but join Facebook while surfing web for harvest instruction. Stop doing anything useful in life. Repeat step three.

6.) The year after that, notice topgrowth is huge! Dig up pots in late fall after first frost, only to find that horseradish was given ample time for the roots to find their way out of the (probably not deep enough) pot through the drainage holes, and is now either headed for the asparagus bed or to the Earth's core.

7.) Curse. Dig up as much of escaped root as possible, and wonder what spicy hot asparagus will taste like. Cut side shoots for processing, and replant main root in the same pathetic pot, vowing to deal with it in spring. Wonder how difficult horseradish will be to mow. Go back in the house and play Mafia Wars, or Word Twist, or Farmville, or any other stupid thing people are doing on Facebook. Tell husband you are an idiot.

OR, alternatively, you can follow the above instructions except for step 3, and harvest the roots yearly, replanting some of them for next year's crop. You probably should also not join Facebook, or start playing Mafia Wars, but that's more of a marriage counseling tip than a gardening suggestion. Just sayin'.

Saturday, December 5, 2009

Recipe: Potato & Leek Soup ... kinda

by Tom DiGangi, Jr.


After a long absence, we returned home to the garden on the weekend after Thanksgiving. The morning temperature was 31F, the first freeze. Yet, the garden was still doing its thing. We pulled up some leeks, celery and horseradish, which were still doing fine. Then we grabbed some potatoes and garlic that were harvested earlier in the year and stored in the basement. Time for lunch!

If you are interested in traditional potato and leek soup, I highly recommend the recipe by Paul Bocuse presented in French Chefs Cooking. It is great, classic and clean. It is a staple in our house, and we cannot improve upon it. The following recipe is not traditional, but based on the founding premise of the Bocuse classic.

Serves 4

Ingredients:

2 Leeks, white parts only sliced thin

1 Stalk Celery, white stalk from the heart of the plant sliced thin

2 Yukon Gold Potatoes, peeled and sliced thin

2 T. Butter

1 Quart Turkey or Chicken Stock, enough to cover the vegetables

2 T. Heavy Cream

1 T. Homemade Horseradish (see other entry for recipe)

2 T. Freshly Minced Celery Leaves

Kosher Salt to taste

Procedure:

Melt the butter in a pot and add the sliced leeks and celery stalk. It is important to only use the white parts of the leeks and celery to ensure the soup retains its white color. Sweat the vegetables for a few minutes to soften. Add the sliced potatoes, season well with salt and stir. Add the stock, using enough to cover the vegetables. Bring to a boil, then lower to a simmer and let cook for about 15 minutes, or until the potatoes are soft.

Puree the soup in a blender or food processor. Press the pureed soup through a sieve. If the soup is too thick for your liking, thin with a little water or milk. If too thin, return it to the pot and reduce over low heat until your desired result is reached. When the consistency is correct, add the heavy cream, horseradish and finely minced celery leaves.

Serve with crostini (toasted bread) that has been rubbed with a clove of garlic and drizzled with melted butter. As for wine, serve with anything you like because butter and potato marry with virtually everything.

The Last Harvest


Clearly, we spent the fall doing a bit more than blogging. Tom wrote a lovely article about corn that should have been published in September, but I couldn't find a proper corn related picture that I liked, and got distracted. October's article should have been all about the awesome take from our herb garden and the experimental ways we tried to preserve it, including freezing, drying, pureeing with sugar, and potting up entire plants. November? Well, we weren't at home until the end of November, and the garden should have been rife with neglect and littered with destruction by the time we returned. Instead, that early spring labor paid off, and quite a few of our crops were not only producing, but still at their best.

Although the ground was not yet frozen, our zone 6 garden must have had a few frosty nights. The basil was a toasty black color and the summer vines were a twisted mass of decay. Helpful worms had skeletonized my fall cauliflower bed. The parsley was still a beautiful vibrant green, while the leeks, swiss chard and celery were perfectly healthy. The tops of the horseradish had died back which meant it was time for harvesting. Had we planted any kale or mustard greens, those too would be more flavorful after a frost.

Therefore, I think we will spend the cold Northeast winter bragging about our harvest, as absurd as that sounds considering the current layer of icy rain covering the ground. We have some lost time to make up for. We also have the inclination to spend time with our family, stoking the fire, creating meals from our harvest, and idly dreaming about the rebirth of the spring garden. I hope you join us!

Friday, August 28, 2009

Blatant Self-Promotion For a Good Cause


Remember a long time ago, when I started this blog, and claimed that I was going to talk about gardening as well as my garden inspired painted glassware designs? And remember how I said that and then started writing about everything EXCEPT painting? Well finally, I have a quick bit painting news to share with, as usual, a food related twist!


On September 1st at the Almond Tree Manor in Alpha, NJ, my hand-painted glassware will be featured as part of the Empty Bowls Luncheon. This event takes place every year and arranged by the NORWESCAP Food Bank. The food bank operates as the middle man between food pantries and local businesses and restaurants with excess supplies. The surplus gets donated to the food bank and redistributed to 120 food pantries in Warren, Sussex and Hunterdon Counties. I volunteer here as much as I can, and have donated about 30 hand-painted bowls to be given away at this event.


The Empty Bowls Luncheon is a great big soup, salad and bread buffet, and man, do I love a buffet. Local restaurants and businesses donate all the food, and local artisans donate bowls to be taken home by the patrons. The bowls are usually hand-thrown pottery from local potters and school art classes, so each one is unique. I donated a bunch of bowls in some existing designs and some never seen before designs as well! Last year they had about 6 different soups, an ice cream sundae bar, Rita's Water Ice, breads from Panera and lots of salads from Shop Rite. I'm excited to see who will be there this year!


Check out the above link for more details, and consider attending this fundraiser if you're in the Central Jersey area!

Sunday, June 28, 2009

Fishing + Farming = Fabulous Fooding, by Tom DiGangi


Fishing is just like farming, except there is no weeding to do, you can’t forget to water your seedlings, and you wear funny outfits that connote, “I am a superhero.” If you have ever seen someone in chest waders, this last phrase will make sense. If not, just imagine a grown man in tights with lots of gadgets hanging from a vest. Laura, my wife and host of this blog, particularly enjoys pointing out how ridiculous I look in said outfit. I digress. The point is… you don’t see many farmers in tights.

Now that I really think about it, there are actually very few similarities between fishing and farming. But, they do share one big thing in common. A meal prepared from either the produce just picked from your garden or the fish just caught from your stream is equally delicious.

A few weeks ago, I decided to combine the two when I hooked a rainbow trout in a pocket of fast water on the stream behind our house at 7PM and ate it at 8PM on a bed of organic field greens, paired with a grassy sauvignon blanc. Technically, the one hour from hook to table doesn’t count as a “30 Minute Meal,” but Rachel Ray isn’t gutting fish and harvesting greens during the ½ hour of pain she serves-up 10 times a day on the Food Network. So, one hour to prep and cook is ok by me.

This recipe is ideal for using-up all those cold weather garden products like radishes and greens before they grow too tough and bitter this summer. If you live by the sea, not the stream, the procedure and salad combination works well for striped bass, snapper, and other small saltwater species.


Baked Wild Trout with Field Greens and Radishes

To make the fish…

Ingredients:
1 Whole Wild Trout (extremely fresh, gutted)
2 Garlic Cloves (crushed)
1 Tarragon Sprig (bruised)
2 T. Extra Virgin Olive Oil
1 Lemon
Black Pepper (freshly cracked)
Salt to taste (sea, grey or kosher)

Procedure:
Preheat the oven to 450F. Place the trout on a baking sheet and coat with only 1 tablespoon of the oil. Sprinkle the exterior and the cavity of the fish with a pinch or two of salt, then stuff the cavity with the crushed garlic cloves and tarragon. Bake the fish at 450F for 20 minutes. Remove the fish from the oven and prepare for service by peeling back the skin (on one side of the fish only) to expose the flesh. Use a spoon to gently lift pieces of the flesh away from the bones, and place on a serving plate. When the one side is clean, gently pick-up the tail of the fish, thus pulling the bones in one big creepy skeleton off of the underside. Discard the bones or use them to make fish stock. Then, use the spoon again to pull the newly exposed flesh from the skin, and place on the serving plate. Finish by drizzling the remaining oil over the fish pieces, then add a squeeze of lemon, a touch of pepper and adjust the salt to taste.

To make the salad…

Ingredients:


Mixed Field Greens (about 4 loose cups)
3 Radishes
1/3 Cup Extra Virgin Olive Oil
1 Lemon (juice and zest)
1 T. Dijon Mustard
Black Pepper (freshly cracked)
Salt to taste (sea, grey or kosher)

Procedure:
In a large, non-reactive bowl, make the dressing by whisking the mustard, lemon zest and juice to combine. Slowly add the oil while whisking to create an emulsion. Adjust the seasoning with salt and pepper, and set aside. Select a mix of field greens. (For my 8PM trout dinner, I chose a combination of romaine, oak leaf, endive and arugula, all from the garden. My father is particularly fond of a mix called, in Italian, “tre colore,” consisting of arugula, radicchio and Belgian endive. But, anything you like is appropriate.) Cut the radishes into matchstick size strips. Add the radishes and greens into the bowl with the dressing and toss gently to coat. Serve immediately.

Saturday, June 27, 2009

Useful Weed Primer: Broadleaf Plantain


If you've been following my blog, you already know about my recurring theme of the trials and tribulations of a lazy gardener. Therefore, it will come as no shock to you that I hate weeding and have not yet found a way to justify not doing it. Not until now.


Think for a bit on the definition of a weed. Really, a weed is just a plant that appears in a place you don't want it. Grass in your raised herb bed is a weed, but herbs in your lawn are weeds too. Speaking of lawns, ours is a disaster by conventional standards. I'm not sure if any of what's growing there is actually grass. I don't care because I sort of hate the concept of a lawn. If I had the time, energy and back strength, I would rip it all out and make a huge showcase garden. Without those factors in my favor however, I need to learn to like both the grass and the weeds. Perhaps if I could find a positive quality about all the weeds in my lawn, I could put to bed some of my weedy lawn angst!


Two gentlemen have arrived on the scene to aid me in my agenda. Cyrus Hyde, an herbalist and owner of Well-Sweep Herb Farm, led lecture tours at their open house event a few weeks ago. Unfortunately, Queen Sophia was in no mood to tolerate herbalists or plant discussions of any sort. If we were not hanging out with the dogs or watching the chickens, she was a crabby crying meanie. Hence, Cyrus' mountain of knowledge about his farm and plants was mostly lost. I did get a chance to learn three things: 1.) horsetail grass can scratch any metal and can sand wood more beautifully than any sandpaper 2.) wild ramps grow in our area and are available for purchase and 2.) most of my lawn is actually a potential first aid cream! Success!


According to Charlie, broadleaf plantain, a common garden & lawn weed, is great for soothing sunburn , treating insect bites and taking the itch out of poison ivy. He prefers to use a match to wilt the leaf and squeeze out the juice onto the affected area, or just slap the wilted leaf on there whole. Without a source of flame, the good old fashioned chew-it-up-and-spit method works too. Either way, you have to abuse the plant a bit to get it to release it’s juice.


I can't begin to explain how happy I was to hear this. We literally have this stuff growing everywhere. I went home to do more research, and easily found a few great websites with lots of plantain facts. Baby leaves are edible in salads and high in vitaminA, B1, C, and K along with riboflavin and calcium. Leaves also contain chemicals such as aucubin (a strong anti-toxin) and allantoin (wound healing and skin regeneration). Plantain has been used medicinally by Europeans for hundreds of years as a cure-all, but modern research is confirming its wound healing and anti-inflammatory properties. In Germany, the commission that regulates herbs and herbal uses also approves plaintain for use soothing coughs and mucuous membrane irritation during colds.


For more information and some homemade healing recipes, check out the following sites:


www.altnature.com
"Medicinal" herb tea: For colds and flu use 1 tbls. dry or fresh whole Plantain (seed, root, and leaves) to 1 cup boiling water, steep 10 min. strain, sweeten. Drink through the day.
Healing salve: In large non-metallic pan place 1lb. of entire Plantain plant chopped, and 1 cup lard, cover, cook down on low heat till all is mushy and green. Strain while hot, cool and use for burns, insect bites, rashes, and all sores. Note: used as night cream for wrinkles.


www.prairielandherbs.com
go to the site for instructions and dosage amounts on plantain tea as a cough treatment, as well as instructions on how to make your own herbally infused oil.


www.botanical.com
this site has a few recipes for treatment of odd ailments and more details about plantain’s uses throughout history.


Of course, after all the chatter, I had to see for myself. I tried it out on the constant case of poison ivy that I get on my forearms from May to October every year. Sure enough, it worked. A week later (and still as of this minute) I got a lovely case of secondary poison ivy over most of my face and eyes, but I've been hesitant to try it there. I might just have to, since the steroid shot is not kicking in yet. Tonight I just might be found hunched over the cauldron (modern day cauldrons go on electric stoves, of course) mixing up a witch's brew of herbal healing.


I am now officially hooked on discovering the beneficial properties of all the volunteer plants growing in my lawn and garden beds. Lucky for me, my enlightening moment at Well-Sweep Herb Farm was quickly followed by a wild foods foray given by Steve “Wildman” Brill. My next article all about Steve and his quirky tour of edible weeds coming soon!

Sunday, June 21, 2009

Garlic Scape Original Recipes By Chef Tom


As covered in my long-winded blog entry from last year at this time called In Defense of the Lazy Gardener, I accidentally discovered that garlic has more than just the bulb to offer up for good eats. At the time, I had earmarked twisty curly Q top of my garlic plants for the compost pile. I knew that the twisty part was actually the forming flower, and that the growing flower would sap energy from my precious garlic bulb. I don't know what made me stop, but a quick google search turned up the knowledge that this part of the plant was actually an edible seasonal delicacy known as the "garlic scape". How did we live before Google? And what exactly do you do with a garlic scape?


This year, we were ready and waiting for the scapes. But more googling for recipes resulted in pesto, pesto and pesto. There had to be something else, but I am no culinary genius. As luck would have it, my husband Tom is also my personal chef, and the following blog entry is written completely by him. Enjoy the recipes, but keep in mind that Tom is Italian which means that he does not believe in actual measurements. You take some of this, a bit of that, and you make it into a great big something else. I forced him into using real numbers for the ingredients list, but feel free to adjust for personal taste.

Intro to the Garlic Scape, by Tom DiGangi

Garlic scapes are the long curly-cue stems that produce the flowers, and ultimately, the seeds in the life cycle of the garlic plant. Most people only eat the cloves that comprise the bulbs of garlic plants. But, the scape is a near-perfect, tender, juicy and green representation of pure garliciness.

For several weeks in June of each year, our family enjoys garlic scapes in virtually everything. If you grow your own garlic, live near someone who does, or have access to a farmer’s market, get a hold of these things. Here are some simple ideas of how you can enjoy them, too.


Garlic Scape & Rucola(Arugula) Pesto

Pesto is usually made with basil, but this early in the season our basil is just thinking about growing. So, we replace the herby pungency of basil with the unmistakable scent and peppery finish of rucola. Rucola is a ubiquitous Mediterranean edible weed that is a cousin to arugula, which is widely cultivated in the USA. Our rucola has been reproducing every year since 2002 when we brought some seeds home from a trip to Sicily. It smells and tastes great, plus it is carefree to grow. We just let it go to seed naturally and every spring and autumn we have a tasty reminder of the Sicilian countryside.

Ingredients:
1/2 C. (about two stems) garlic scape, cut into 1 inch lengths
2 C. Rucola or Arugula
1/4 C. pine nuts, toasted
1/4 C. Parmigano Reggiano cheese, grated
1 lemon, zest and juice
1/2 C. extra virgin olive oil
Salt to taste (sea, grey or kosher salt)

Procedure:
Gently toast the pine nuts in a dry pan over medium heat until the nuts become fragrant and turn just slightly brown – not black! Combine the pine nuts, garlic scape, rucola cheese, lemon zest and juice and salt in a food processor. Process until finely ground. You may have to occasionally stop and scrape the sides of the processor with a spatula. While the processor is running, slowly drizzle in the oil. Taste and adjust the salt. Serve as a dip for crusty bread or hearty vegetables (e.g. roasted onions or potatoes), topping for grilled meats, or as a sauce for pasta.


Garlic Scape Romesco

This is a riff on the classic Spanish sauce/condiment, which usually relies on tomatoes. In the summer, when it seems like everything we make contains tomatoes, this variation using bell peppers is a nice change of pace. The bell peppers replace the color and sweetness, and the vinegar adds the necessary acidity.

While this recipe is more suited to late summer when peppers are producing at their peak, it is no big deal because garlic scapes freeze very well. To freeze the scapes, just cut the stems into 9 inch long pieces, lay them out on a tray and put them in the freezer. In a couple of hours, gather up the frozen scapes and put them in a one gallon-size plastic bag. Return them to the freezer and they will keep for months.

Ingredients:
1/2 C. (about two stems) garlic scapes, cut into about 1 inch lengths
1 red, orange or yellow bell pepper, roasted
1 dried chili pepper (type of chili is up to your heat tolerance – we like chili de arbol)
1/4 C. almonds, slightly toasted
3 T. red wine vinegar
1/2 C. extra virgin olive oil
Salt to taste (sea, grey or kosher salt)

Procedure:
Roast the bell pepper over a burner or in a very hot oven until the skin turns black. Set the blackened bell pepper aside in a bowl and tightly cover with plastic wrap. After 15 minutes, rub the blackened skin from the pepper and remove the seeds and stem, and set the pepper flesh aside. Soak the dried chili in a small cup of boiling water for 10 minutes. Remove the chili from the water, coarsely chop and set aside. Gently toast the almonds in a dry pan over medium heat until the nuts become fragrant. Do not let them burn and turn black! Combine the garlic scape, chili, bell pepper, almonds, red wine vinegar, and salt in a food processor. Process until finely ground. You may have to occasionally stop and scrape the sides of the processor with a spatula. While the processor is running, slowly drizzle in the oil. Taste and adjust the salt. Serve as a dip for crusty bread or hearty vegetables (e.g. roasted onions or potatoes), topping for grilled meats, or as a sauce for pasta.


Chilled Potato, Turnip and Garlic Scape Soup

This is a surprisingly simple, healthy and refreshing idea for the early summer. We often serve the soup out of a thermos into shot glasses with appetizers out on the deck. Doing shots of soup evokes a party atmosphere without the undesirable side effects of embarrassment, shame and a hangover that accompany shots of vodka. Although, if you insist on alcohol, add the vodka, tomato juice and Tabasco to the soup and you’ll have one hell of a Bloody Mary.

This particular recipe is evidence of the “if it grows together, it goes together” school of thought. By the end of spring when garlic scapes are ready for harvest, our Zone 6 garden is turning out beautiful turnips, creamy Yukon gold potatoes and a hedge worth of tarragon. If you’ve got a cow, then you’ve got the heavy cream covered, too, and you are officially living off the land.

Ingredients :
2 medium sized turnips, cut into ¼ inch dice
4 medium Yukon gold potatoes, cut into 1 inch pieces
1/4 C. (1 stem) garlic scape, finely chopped
1 sprig of tarragon, roughly chopped, with a few whole leaves reserved for garnish
Heavy Cream
Water (spring or some other high quality)
Salt to taste (sea, grey or kosher salt)

Procedure:
Place the turnips, potatoes, garlic scape, tarragon and several pinches of salt in a stockpot and cover with the water. The water should cover the solids by about an inch. Bring to a boil, than lower to a simmer and half-cover. Cook until a fork smoothly is inserted and removed from the turnips and potatoes, about 30 minutes. Discard the tarragon sprig and let the soup cool. Puree the cooled soup in a blender or food processor. Press the pureed soup through a sieve. If the soup is too thick for your liking, thin with a little water or milk. If too thin, return it to the pot and reduce over low heat until your desired result is reached. Remember, thinner is better than thicker for a cold soup. When the consistency is correct, add a tablespoon or two of heavy cream, and chill for service. Garnish with finely minced tarragon.


Tom's 2008 garlic scape invention: Long-in-the-tooth pea & garlic scape soup

Thursday, June 11, 2009

Make Your Own Hanging Baskets

Ok, I was inspired to write this blog entry a month or so ago when I was making my own adorable hanging baskets, because I do really get a kick out of planning and arranging them. I took pictures, and made plant list suggestions in my head, and even scoped out what was available at the local Home Depot so that I was recommending readily available varieties. But of course, I didn’t do it, and now it’s the middle of June and supplies are likely waning. My one entry per day challenge is still kicking, so I am writing my delayed advice anyway. I know at least Dina is interested!


Let me first state my disclaimer: I am no landscape architect, and have never taken a single design class. I just read a lot of gardening magazines and have tried stuff out over time. I can’t tell you this is the exact right way to do it, but I can tell you easy rules that I use to design my baskets.


Laura’s no-brainer rules for basket design:

1.) Pick your sun exposure

I always have two types of baskets. The backyard ones see blaring hot full sun all day long, and the front porch ones will never see one shred of direct light for as long as they live unless I take them down and move them into the yard for watering. Those are some extremely different and obvious plant choices. This year I also did some planters on the side of the house with part sun exposure, so that's a little trickier, and I’m not sure how those will do.

2.) Pick your container


The type of planter actually determines your watering needs, and therefore the kinds of plants you should choose. The standard white plastic hanging pot obviously retains moisture the best (although you’ll still need to water frequently during those dog days of summer) and is the most popular. For aesthetics, I like coir & wire baskets the best. I’ve been using the same ones for eight years now, so it’s worth the initial investment. If the coir wears out, it’s easily replaceable, and you can pick these up at your average big box store in spring and early summer. Just about any kind of plant will work in these. If you’re trying to plant in clay or terra cotta though, consider that fact that these pots retain water for all of 48 seconds. You have to commit to watering constantly, or buy plants described as “drought friendly”, “succulent”, or “for rock gardens”. I bought one of those adorable terra cotta strawberry pots with all the pockets and very promptly murdered every pocketed strawberry plant. The ones on top somehow survived though, and this year the pockets contain a very pretty hot pink portulaca. Lesson learned!


3.) The rule of 3’s

This is the only real design principle I know, which I learned from a combination of garden magazines, home design books, and Bravo tv in general. Don’t know why, but things go better in 3’s. Better yet, I apply my Rule of 3’s to three aspects of plant design – number, shape and color. Whatever do you mean, Laura? Well, let me tell you!


Number: I always do at least three plants per container, and if the container is larger, then I go up to five. The sub-rule to the Rule of 3’s is, if you don’t use 3, at least use some other odd number. Again, I don’t know why. Maybe 2 of something looks too unfinished, like you meant to elaborate but didn’t get a chance. Maybe the pro-3 lobby is stronger than the pro-2 lobby. If you are a designer, please speak up and explain! Enquiring minds want to know.


Shape: My baskets generally have three different types of plant shapes – spiky, mounding, and cascading. Finding plants that fit this description and meet your sun requirements is not hard at all to do! It may take some label reading at first, but I’ll list my favorites for you below to get you started.

Color: I won’t go too far into color theory here. That would be a huge topic all on it’s own and I’m not qualified to speak on it. Plus in the end, it’s really about preference. You can choose a basket of all big bright colors, mix up only pastels, or even choose all different plants that feature the same exact color. No matter what the overall color theme is, I still use the rule of 3’s. My favorites tend to be combining 3 highly contrasting colors, like burgundy – silver – hot pink, or burgundy – lime – white. The best thing to do is to pick up plants and see what they look like together grouped in pots. Do you like the effect and color combo? Good, you’re done!


Now it’s picture and basket recipe time!

Shade basket, left to right clockwise:
Lamium, "pink chablis"
Coleus, "black dragon"
Dracena spike
Dusty Miller, "silverdust"
Oxalis, "charmed velvet"
Alyssum, "snow crystals"


Shade planters: This is a funny little plant invention that I bought at Lowe's last fall. There's an indented middle section with space for a small pot where you can plant seasonal annuals. The outside larger pot contains ivy, which stays green all season. This way, you can change out the flowers in the center pot when it's time to go from summer to fall plantings. Cute! I have these on my front porch, so the shade plants from above are repeated.


Sun basket, left to right clockwise:

Petunia
Sweet Potato Vine, "blackie"
Dracena spike
Licorice Plant (helichrysum petiolare), "white licorice"
Calibrachoa, "callie rose"


These pictures are from the beginning of May when I built them. Maybe later I'll post an addendum with what they look like now. In the meantime, happy planting!

Tuesday, June 9, 2009

Cast of Characters: FRANK!!!


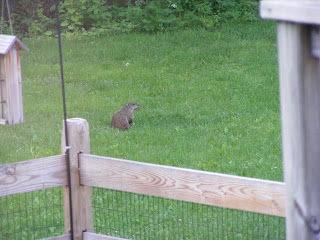
Frank is a groundhog.


All groundhogs are Franks.


Frank, in various manifestations of size and gender, has plagued me since my beginning days as a gardener - except for the gardening I did entirely in containers on the second floor balcony of that apartment complex. Even then, I'm sure there was a Frank or two, rubbing his meaty little paws together while staring upwards and formulating a plan.


But really, all this humanization of animals does nature no justice. Groundhogs are not evil, conniving wizards. They are simply hungry little rodents with somewhat magical powers. For example, I believe groundhogs are capable of completely dissolving their skeletal systems at will so as to shimmy under a 2 inch fence gap, Mission Impossible style. They also have some sort of otherworldly endless appetite. I'm amazed by their ability to settle into a nice dining experience in the grassy fields next to a 65 mile an hour highway, completely oblivious to the rattling earth and rushing wind caused by passing 18 wheelers. However, should I even step out of my back door when a Frank is busily snacking on my weedy lawn, he shoots me the "whatchoo talkin' bout Willis?" suspicious one-eyed stare, and then he waddles off at top speed into the woods. Historically, all of my past Franks seem to prefer take their chances facing off with a truck rather than dealing with me. Look out boys, that crazy bitch is out again! The most impressive and newest stunt I've seen was just today when I watched him scrabble 40 feet up the mulberry tree with an almost bored self-confidence. I could practically see him peeling off his furry skin to reveal the spiderman suit underneath.


You see, I have a love/hate relationship with Frank that stems from my daily dealings with humans. I am nice. Too nice. I am nice to store clerks, customer service agents, and even (gasp!) medical claims specialists. I wind up being a repressed pent-up stew of anger and resentment. And then an innocent Frank crosses my line of sight, meandering about the yard nibbling on this flower or that weed. Aha! Got him! I tear out of the house screaming and brandishing kitchen utensils, with the fury of a thousand unpaid medical bills and bad customer service incidents, and shout "FRANK! YOU FAT BASTARD, YOU GET THE HELL OUT OF MY GARDEN!!!". And poor Frank does one of those cartoon poses where the shocked animal leaps straight up into the air in fear and starts running in place before his little paws even hit the ground. As he flops into the woods as if being chased by satan himself, I smile and let out a little sigh of relief. Ah, that felt good. Think I'll get more coffee.


Around this time of year, Tom and I start referring to Frank as though he is a family member. "I saw Frank at the swing set today" or "Frank seems to prefer the baby squash to the baby cucumbers." This is also around the same time that our friends and family start to consider us clinically insane. "Why don't you just get rid of him?" they ask, and immediately start offering up their personal cache of weapons from poison, to traps, to pellet guns and beyond. But I always turn them down. Why? Three reasons.


#1.) What would you have me do instead? Unleash my anger out on the humans who actually inspire it? Lose my insurance coverage because of the string of expletives I used on the Horizon rep after calling my fourth 800 number to be told "we don't handle that"? Pull a hammer out of my diaper bag and matter-of-factly smash to bits the device my clerk is too busy OMG!!!ing on to ring me up? Trust me people. The world is better off with me as the crazy lady running around my yard chastising rodents, than with me as the crazy lady running around Michael's chasing down store clerks shouting "What do you MEAN it shows 17 in stock but they are on the truck??? They were still on the truck last week! Where is this truck? Does it ever stop driving? Does WONDER WOMAN drive this truck? AM I THE ONLY SANE PERSON IN THIS PLACE???" And so on.


#2) Sure, I could off Frank. But Franks are like gray hairs - you pull one, five more come back in it's place. Maybe not in Frank format. Maybe they reappear as deer, rabbits, moles or squirrels. Don't even get me started on the countless bugs and diseases. My point is, if mother nature has some sort of cosmic judicial system, the void of one murdered Frank is sensed by the hungry deer on the prowl for beautiful hosta leaves, or that fleet of Japanese beetles that just hatched from your neighbor's lawn. You're surrounded. Just put the weapon down, and back away slowly.


But let's say you keep your gun and your can of spray and set up shop on the edge of your garden. In the end, you might get more vegetables than I will. But you'll wind up having to do that all day, every day, and what fun is that? Better to just jump in with both feet, and muck around in the yin and the yang of it all with the rest of us - aphids & ladybugs, tomato hornworms & parasitic wasps, groundhogs & anti-groundhog fencing ... or maybe a barky dog. The enemy of my enemy is my friend - if not in global politics, at least in gardening. So for now, I will find ways to use Frank's natural tendencies against him while engaging in my own trifecta of weaponry - menacing looks, degrading insults, and generally scaring the bejeezus out of him whenever possible.


#3.) If I kill him, how many hilarious stories will you miss out on in the coming seasons? Ok, maybe they are not that funny, but they are funny to me. Being the star of my own self-deprecating comic melodrama, I need a character who can be the butt of my jokes while accentuating my own neuroses. In other words, if I am the Kathy Griffin of organic gardening, Frank is my tour manager, Tom.


I have a lot more Frank information to share, but for now I'll leave you with this new twist. This year's Frank has a girlfriend Frank, and I'm sure the little Franklets are on their way. Bring it on, Franks! It's going to be a fun summer.

Wednesday, May 13, 2009

Spring Garden Progress

Now that folks in the northeast have stopped Ark building long enough to get outside, it seems like a good time for a spring garden veggie update.


Potatoes-in-Bucket are going along swimmingly (literally, considering all the rain this week). So far the bucket potatoes are twice as big as the trenched ground potatoes. However, the mulched potatoes in the tree line are barely sprouting, probably due to excessive weeds and minimal sun.


In the middle of the potatoes in this picture is my whiskey barrel of mint, which I've been growing with almost purposeful neglect for 8 years now. I usually keep three types - chocolate mint, spearmint, and peppermint. Mohitos, anyone?


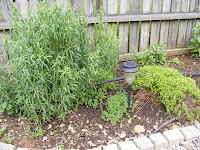
Speaking of herbs, most everything coming up now is perennial, although I'm starting to see some volunteer seedlings from last year's basil, parsley and cilantro. The big guy on the left is tarragon, with golden thyme next to it.


Here we have chives, Greek oregano and hot & spicy oregano in front, with some chamomile and a strugglig sprig of stevia in the back. I planted the stevia this year, and also had to replace my rosemary, which never seems to overwinter for me. My sage also died after lasting a few years. I'm hoping to get a common sage along with a pineapple sage, which is gorgeous as a huge ornamental plant. If you see that variety out, you should get it and put it someplace in full sun with lots of room - and wait for the show.


Moving along to the veg, this bed is badly in need of thinning, with spinach and some out of control turnips. And lots of grass clippings because the lawn was just mowed!


Next up is the bed where half the work was done for me in the fall. The greens furthest away is a variety of arugula called rocket, or wild arugula. I had arugula in this bed last year and let it go to seed, and the seeds went everywhere. All done! The seeds germinated when they were good and ready, and I didn't have to do anything (although I also now have an arugula lawn and arugula pathways). In front of that, I broadcast some mesculun mix a few weeks ago, and that's coming up nicely too. Both those crops are the kind you can cut and inch above the soil line, and the plants will regrow. Sow it once, and you can have salad for the whole spring and some of the summer. On either side of both crops is my slowly plodding along peas. I'm not sure how much they appreciated that week of 90 degree weather we just had, so we'll have to see how much they wind up producing this year.


The second half of this bed consists of my wall-o-waters housing early tomatoes, peppers and eggplant. The only way to get summer crops started in the ground in spring is with some type of greehouse style protection. In between, I planed a row of carrots and a row of radishes. You can just barely see one of the tomatoes peeking out over the top. Hopefully the combination of putting an early fruiting variety in the wall-o-water means fresh garden tomatoes in June!


STRAWBERRIES! This will be year 3 for my strawberry bed. Last year we were buried in strawberries for all of June. It's worth losing a bunch of space to a strawberry patch, but they need to be contained somehow or they will run right over you. Even then, it's like keeping puppies in a box. Good luck!


Early morning dew on a strawberry leaf.


This shot is of my perennial bed, which is my asparagus patch, and horseradish in buried containers. We're also in year three of the asparagus, but I feel like it should be producing better at this point. Asparagus takes a few years to really establish, so maybe I'm just jumping the gun. The horseradish are in buckets because that's another crop that will take over (underground) if left unmanaged. In back is a cover crop of rye which I have yet to till under and let decompose - the purpose of a cover crop. Hmm, not sure when I'll be getting to that one.


Onions, shallots and garlic and doing just fine.


And last but not least, the Earth Boxes are housing a variety of lettuces. It looks like the endive and lettuce are ok, but the radicchio and mache are not so hot. For more details on the Earth Box, check my blog entry from 7/29/08.


That's all the news for now. In just a few weeks - TOMATO TIME!


Sunday, May 10, 2009

Joyce's Mother's Day Heist, Pt 2: reprinted from 5/12/08 entry

Once again, if you did not read JMDH part I, here's the quick story. I mailed both my mother's and grandmother's gifts for Mother's Day in the same package. Each gift was clearly labeled as to who got what, but they weren't wrapped. I assumed my mother would give my grandmother her gift. My mom emailed me to thank me, and the following madness ensued.

Email #1:

From: Joyce
To: Laura

Thank you for the card and ABSOLUTELY DELICIOUS candy. I told
Grandma you sent her candy when we talked last night. I will bring it
to her the next time I go for a visit.


Email #2:
From: Laura
To: Joyce

i'm glad you liked the candy. does grandma like chocolate covered cherries? i always remember eating them at her house, but i don't remember if she liked them. i remember she liked maple though, but the cherries took up the budget.


Email #3:

From: Joyce
To: Laura


I must confess, I ate the cherries bec. carmel is not one of my
favorites. Hopefully, it is one of hers!!!
Love you, J.


Email #4:

From: Laura
To: Joyce

sorry, i couldn't remember besides the pretzels what you like. doesn't grandma have dentures? i don't think she can eat carmels if she does. i hope you didn't eat ALL the cherries on her, and if you did, you'd better tell her that they were meant for her! if neither of you can eat the carmels save them for me.


Email #5:

From: Joyce
To: Laura

I didn't eat all of the cherries since I only got them yesterday and
decided to ration myself to one a day bec. they are soooo good and it
would be nice to let that great flavor linger for a few weeks. What a
great treat!!! I will give grandma the caramels and the pretzels and
ask her if she wants them, if not then you can have them and I can pick
up something else from Gertrude Hawks for her.


Email #6: this is where I foolishly cc my dad, thinking he can help

From: Laura
To: Joyce
CC: Jim

JOYCE ANN, YOU SHARE THOSE CHERRIES!!!! i mean it! the pretzels and the carmels were supposed to be for you, as the placement of the cards clearly indicated. if you want to barter with grandma who gets what, that's fine, but you'd better let her have some of those cherries if she wants them. boy, that'll teach me to send multiple gifts in one box. you are a crafty crafty little woman.

i am alerting dad by cc so he can enforce the fairness of this trade mission.


Email #7A: my dad responds to me, but does not cc my mom

To: Laura
From: Jim

I am a little confused here. I assume your mother received some food that
she is hiding and/or hoarding. This is the first I'm hearing about it. You
should know by now she doesn't share when it comes to delicious treats. She
has always hidden food in the bedroom when she doesn't want to share. Your
grandma is on her own, your mother never did listen to me anyway. I guess
we will be seeing you in a few weeks. Take care.


Email #7B: my mom responds to me, having not seen my dad's email to me


Why are you telling on me? Your father never even saw the candy bec.
it's hidden in my bedroom. Boy, I can't believe you are doing this. I
DON'T WANT TO SHARE THE CHERRIES!!! This is just awful.


Email #8:

From: Laura
To: Joyce

you just made me laugh right out loud. i KNEW you were probably hiding them in your room. you're lucky grandma doesn't have email, or i'd tell her too. in fact, if i had uncle walter's email with me at work i'd tell him so he can tell grandma, just in case you knock dad off in his sleep before he has a chance to talk. uh oh, now i realize i put dad's life in jeopardy. well, hopefully all those years of private investigator shows will give him some tips on survival.


Email #9:

From: Joyce
To: Laura

I hate to tell you this but your father is not going to do anything to
help you because a long time ago he HAD to live with you but now he HAS
to live with me. Because, I'm the one who puts a smile on his face (it
has to do with sex) he will not upset the applecart and my dear, whether
you realize it or NOT you are living in another state. On the serious
side, I did not eat another choc. cherry so there is only one missing
from the box. BUT I still haven't decided if I am going to give them to
grandma yet and you CAN'T make me. If I decide to act like a grown-up
then she will get to taste a few but if not, they will remain hidden in
the bedroom and she can struggle with the caramels. You just gave me an
idea. Now that you know my hiding spot, I may have to look for another
one!
J.


Email #10:

From: Laura
To: Joyce

re: dad smiling - gross. i did not need to know that.
re: chocolates - on second thought, i'd better not reproduce because i hear insanity skips a generation and i'll probably just have the luck of birthing some child who will some day stab me in the back and steal my mother's day gift.


Happy Mother's Day to all you honorable women out there, who will one day be thrown under the bus by your own spawn!

Friday, April 24, 2009

I LOVE MY NEW MULCH!


There's really nothing of value to say here. I just love my newly mulched beds at the front of my house!
I was kind of going for a Japanese feel to our plant choices when we first landscaped this area. It was inspired by the two gangly rhododendron that refused to come out of the ground, even when lassoed with chains and pulled by a truck. Since we had to give up moving them, I decided they had a bonsai flair about them, so I surrounded them with low growing complementary plants with silver and burgandy colors to them, like Japanese Barberry, Blue Star Junipers, and a Cutleaf Japanese Maple tree.


I REALLY wanted an authentic stone lantern to finish the look, but hey - you can't be $30 at Bed, Bath and Beyond for a fake one. It's even got a solar powered light in there! The grass is blue sedge, and the burgandy creeper in front of it is called Voodoo Stonecrop.


This is my show-stopper spring perennial flower on the front walkway called "Helleborus" or Lenten Rose. Everybody loves these guys and they are so easy to grow. They are a perennial evergreen for part to full shade areas, and the prickly leaves make them deer resistant. In my zone 6, they start blooming in March and are in full swing by April. Eventually the flowers fade to a pretty dusky green color.


The purpose of this bed is to hide the various septic pump equipment, like the lid to the tank and weird pipes and stuff. I made this my pink and blue bed, although it's too early in spring to really know that at this point. The main features are the three hydrangeas in the middle, along with some dicentra ("bleeding hearts"), astillbe, spirea, columbine and some grasses. This bed actually looks better now, since Tom, my official workhorse, has since edged all around it.


These are baby astillbe, which look kind of like furry snakes - surrounded, of course, by my gorgeous mulch.


Last but not least is my 173 Brunswick Pike memorial bed, replicating the garden I had in my very first house either by flat out stealing the original plants (it was a long 9 months before that thing sold) or finding the exact same plants already in place at the new pad. And just like at my old house, I still can't get anything but weeds to grow up that damn trellis. When this bed grows up more, it will have lots of shade friendly plants, since I seemed to have absolutely no sun where I used to live. Some good shade perennials here are lungwort, Jacob's ladder and dead nettle.

And now for the final tie-in .... doesn't my mulch look great?!?!?

Friday, April 17, 2009

Potato Woes


I forgot to mention potatoes in my spring garden line-up, which is not surprising. Potatoes and I have a sordid history. One of us in this relationship is just not giving 100%, and for my part, I'm blaming the potatoes. Even with my best efforts, my potatoes tend to not live up to their potential. The potatoes, I imagine, would likely complain about my lack of consistent watering and general laissez-faire gardening style. Still, I'm not giving up just yet. Homegrown fresh potatoes are out of this world, and completely unlike anything you can get at the grocery store. So in 2009, I'm attempting three different planting methods that I haven't tried before.

1.) Trenching

This is the method I got from the handout at Agway where I bought my potato starts. Apparently potatoes don't appreciate being plopped into dense, clay-like soil and just left there. The proper way to treat them is to build up the soil around the plant at the stem, giving new potatoes room to form. In my raised bed, I dug two trenches about two feet apart, and planted potato starts around a foot apart in the row. As the sprouts grow, I'll pull down the dirt from the sides of the trench to keep the plants covered. Hopefully this will improve crop yields.


2.) Mulching


I knew there were other methods of growing potatoes, so some quick internet research resulted in a great page from Irish Eyes Garden Seeds. This page has complete start to finish potato growing tips, including two alternative planting methods. Mulching is when you prep the planting bed like you normally would, but instead of trenching, the potatoes get placed on or just below the soil. Mulch, like straw or shredded leaves, gets placed on top 6 to 10 inches deep. Continue to replenish as the stem grows, and harvest normally.


I don't have a picture of this method, but I don't have high hopes for it either. The only room I had left for them was out of the fence perimeter and solidly into the wilder parts of my yard - groundhog/mole/vole territory. Also, because it's not within reach of the hose, these guys are going to be subject to the watering schedule of mother nature herself. So, uh, yeah. Good luck out there potatoes!


3.) Cage/Garbage Can Method


The above link at Irish Eyes Garden Seeds calls it the cage method, and this eHow article talks about growing potatoes in a garbage can. Either way, this is a great method if you have space constriction, are growing vegetables in containers, or have problems in the past with diseases in your soil. As a member of the Solanaceae (Nightshade) family, potatoes are prone to the same diseases as peppers, tomatoes, and eggplant. To avoid passing these diseases through the soil from one year to the next, you should not plant potatoes (or any other family member) in the same spot for three years in a row. If you have a small garden, crop rotation by these standards is pretty much impossible unless you are using containers.

Since my potatoes religiously die back early from some kind of disease and have a low crop yield, I'm overly excited about this method. I took the hints from the Irish Eyes Garden Seeds article about planting in containers 18" across and at least 2 or 3 feet tall. I put finished compost in a layer at the bottom, and put dried chopped leaves on top. The trick here is to keep the pots watered well, which is not my strong suit. Wish me luck - and greater attention to detail.

OK, I have so many entries in my head to write, but I really ought to be taking advantage of this coolish morning to get some work done. See ya!


Saturday, March 28, 2009

Check Out My Tools!: Must-Have Garden Supplies


That's right, it's product promotion time, but I still don't get any money for this stuff. And because of that, you can wager that I legitimately mean what I say!

My favorite spring garden supplies are as follows:


Reusable velcro ties & bamboo poles

Check out my adorable pea trellis! Bamboo usually comes in 5 or 8 foot lengths so it meets many large scale needs, but can be cut down to any size. It's sturdy, attractive, plentiful and cheap. Combined with reusable velcro ties, you can make all sorts of great garden trellises. Here's a link to a simple bamboo trellis from Organic Gardening magazine.


Using plastic zip ties will give you a tighter connection, but I really like the velcro ones instead. I've had the same ones now for years and they are still going strong. Plus I'm not great at building stuff, so I usually need to reposition the bamboo multiple times and that means going through multiple plastic ties. The velcro adjusts quickly, and then you're off and running!


Wall-o-waters


How do you get the earliest home-grown tomatoes on the block? These guys right here. Each wall-o-water is like a mini greenhouse. A series of tubes is connected in a circle. Fill the tubes half way with water and place in the garden for two weeks to heat up the soil beneath. After two weeks, plant your tomato, pepper, eggplant or other summer crop in the wall-o-water and fill the tubes the rest of the way. That's it. The water in the tubes absorbs heat during the day and releases it at night, keeping your plant at a consistent cozy temperature. By the time your plant grows too big, nighttime temperatures are safe for those tomatoes to be out of the bag anyway. Using wall-o-waters will give you a serious six week head start on summer vegetables. You can easily have an early (with wall-o-waters in late spring ) and late (without wall-o-waters, and planted at the proper time) planting, which can give you a solid harvest from late spring to frost! These are easily found in any garden supply catalog, but I'm not sure you will find them on the shelves at garden store. But they should be!


Soaker Hoses

Good watering is key to a successful garden, and the best way to do it is to send the water directly to the roots of the plant where it belongs. Regular sprinklers waste water by sending it flying into the air to be lost to evaporation or to land on the entire plant as opposed to the soil. Too much water on the leaves themselves can lead to disease and mildew problems. Also, when a lot of water hits dry soil fast, it initially tends to pool up and run off. That's more water literally down the drain.


Using soaker hoses is the "set it and forget it" method of watering. You don't need to move a sprinkler around, or stand there endlessly with the hose nozzle doing it yourself. Lay your soaker hoses out so that they snake all around your garden beds. Connect your water supply and let the hose drip water slowly to the base of your plant and directly to the roots. Leave your water supply on long enough (depending on your soil type) to water 1-2 inches, and do this once a week. To determine how long that takes, put a shallow plastic container with inch measurements on it under your soaker hose and see how long it takes to fill. Again, these are reusable for many seasons and come in 25, 50, 75 or 100 foot lengths. They are easily found at any big box store or garden center.


That's all for today. I would be putting down new mulch right now, if not for the rain. It won't be long before I hit you with my next topic about the BEST organic method of dandelion weed control! Stay tuned!

Bring It On, Spring!


Early in the week, I got the news. Friday's forecast called for 65 degree temperatures, followed by a weekend of rain. You know what that means? It means that I plant seeds Friday and walk away smiling, and mother nature is stuck theoretically dragging 50 feet of hose all around the yard doing the watering. Sweet! Let's go zone 6, time to mobilize!

Laura's Comprehensive and Probably Still Too Ambitious Spring Garden Plan


Peas: Apparently, the specific date peas should be planted depends on your religious affiliation. If you are extremely religious, peas are planted on St. Joseph's day. If you are only moderately religious, but have a solid appreciation for holidays that allow for excessive alcohol consumption, then St. Patrick's day is your pea planting time. If you are a secular granola crunchy hippie, then March 15th is your day. Regardless, all these bits of advice seem to be different ways to say the same thing: plant your peas in mid-March, as soon as the ground can be worked.


When did I plant peas? I threw seeds down on March 21st, in between grocery shopping and picking Sophia up from school, because that's when I finally got around to it. Make your own assumptions. And of course, I planted two different varieties but didn't keep track of which went where, and accidentally dug them up a week later when fertilizing the beds. Let the games begin!


Garlic, Onions, Shallots: These bulbs got planted in the fall and are coming up nicely! Three 4x4 beds of garlic gave us enough harvest that we finally ran out only last week. All these can be planted now for fall harvest as well, and you can get onion sets and shallot bulbs at most big box home stores. You might have to head to Agway for the garlic though. You can try planting store garlic if you like, but those are generally sprayed with a chemical that prevents them from sprouting, so it's a bit risky.


Root Vegetables - Radishes, Turnips, Beets & Carrots: Except for the carrots, I always have easy success with this cool weather crop group. Carrot seeds don't seem to like the fact that I'm going to forget to water them regularly while they are germinating, while the others seem to be more flexible about this. That's why I like planting seeds right before the rain is due! The other seeds I pretty much just broadcast around the plot, rake or poke them into the ground and then thin as necessary.

Lettuces & Greens: My favorite thing to do is to buy a mesclun salad seed mix and lightly cover the seeds in the ground in a 2x4 foot patch. In a few weeks, you have a colorful mix of salad greens that will grow back if you cut them an inch or two above the soil line when harvesting. Easy & fresh salad all spring and early summer! If you want to be really particular ( I won't mention any names, but someone in this house meets that description), you can buy the greens separately and make your own mix. Mesclun mix usually has endive, mustard, radicchio, lettuces and a variety of other random colorful greens. This is a great beginner gardener crop, and it can really save you some money when you compare the price of seeds to bagged grocery store salads. My other favorite spring planted greens are spinach, arugula, swiss chard and bok choy, which I usually plant separately instead of mixed together.
I thought I would take it easy this spring, and not start too many summer vegetables under lights in my basement. However, the above scheme does not sound much like taking it easy. Check back for further status reports!


The Big Bad Blog Beginning: Marketing Gone Awry

So awhile back, I was talking to my home business and web marketing diva. I know what you're thinking right now. You're thinking, "Big deal! Everybody has a home business and web marketing diva." Maybe so, but if you're not talking to Dina at http://www.wordfeeder.com/, then you've got the wrong gal.

Since I have the right gal, Dina said, "You should start a blog to help promote your website."

"Really? How come?"

She then said something along the lines of "Hoogety boogety search engine optimization foogety moogety page hierarchy loogety toot toot meta-tags and strategic links...." and many other extremely smart things. Please keep in mind Dina has never actually said "hoogety boogety" to me in any context. What she did do was give me a brief explanation of web marketing that made complete sense, but the wisdom of which I would completely mangle upon retelling. The relevant gist was as follows - a blog, when properly done, can be a great tool to drive traffic to my website.

I mulled this over for quite some time. Could I write clear and informative articles about the decorative painting business? Er, sure, I think. New techniques, preferred paint and brush brands, offers of free templates.....Ooh, but how bout the funny fellow painter ladies I see at my teacher's studio? Or the nutjobs who I meet at craft shows?

And then I started thinking about other humorous stuff, like the time my mother swiped HER mother's mother's day gift from me and refused to give it back. And the stories from my grandfather about the 8-10 different ways he's accidentally electrocuted himself throughout the years, and yet still stands. Or about the time I spent half a day convinced that drunk people snuck into my yard during the night and dug up 48 newly planted impatiens (until I realized a deer ate them).

That's about the point that I realized that I actually want a blog to show the world how hilarious I am, and if I can throw some web marketing in there, so be it. I can make it work. For example, the two funniest things I do are 1.) garden organically 2.) allow people to speak to me. Since I paint flowers and creatures and landscapes, does it count as web marketing if I blog about growing flowers in a landscape while shouting obscenities at creatures? You betcha! And when my mother does something bizarre, should that go in there too? Absolutely. Ah, yes. Yet another blog is born.

So in the end, I will market my website the way I organic garden - seek out the advice of experts, change it all around, and find myself continually shocked when my system doesn't work. Effective? No. Funny? Oh yes indeed! Keep reading.....